Advanced water photography

You can read a great blog post I wrote recently for the Focus on Singh-Ray Filters Blog. It is about the creative possibilities of taking photos of seascapes and water using filters. Some readers contacted me via facebook and twitter and asked for further information about the camera settings of the photos. So I will be of help.
It is the photographer task to make the right decisions for the perfect composition that’s fits his vision. It is easy to get strong visions at the sea but it is hard to master the creative potential of water as a photographic object.
To work on your vision first you have to control your camera.
Advanced water photography: Controlling your camera
Controlling your camera is the first step in taking pictures. Shutterspeed, aperture and ISO settings defining the exposure range in which you can work.
When I am taking a photo at the water I go through this sequence one after another to setup my camera settings:
- Aperture: Gaining a maximum depth of field with the optimal sharpness is my prime goal in 99% of all my water photos. Most of the time I am working between f8 an f16 on my wide angle lenses. If you know your lenses very well you will find the optimal aperture for your vision.
- Shutter speed: Shutter speed determines whether you freeze your water scene or going for long exposures with different looks and feels. There is no rule of thumb because the look and feel also depends on the waters speed. For example: You can possibly freeze the water using 1/100sec, define light movement using something between 1-2sec and define some beautiful fog effect with 3sec and more.
- Filter setting: Filters are increasing your creative range. They are giving you possibilities for your vision. But they will cost you precious stops for your exposure or (thinking positive) they will gain you precious stops for your exposure.
- Aperture (again): Sometimes there is some space in aperture to gain or to loose stops for the optimal exposure.
- ISO setting: For me the ISO settings are like a wildcard after the filter setting. ISO 100-400 work on my Canon 5 D mark II without any quality losses. Don’t forget to enable advance ISO settings on your camera. Especially ISO 50 in advance mode is a burner for time exposure.
- Physics control / Daylight control: Although this is more an environmental setting it affects the camera setting. Sometimes the right light is not a question of color or softness it is more a question about energy. The less light energy you have to catch with your exposure setting the longer you can expose – the more light the shorter. In other words stand up earlier or have a break.
Here are the examples I showed on the singh ray blog with further information:
A classic setup: Ireland
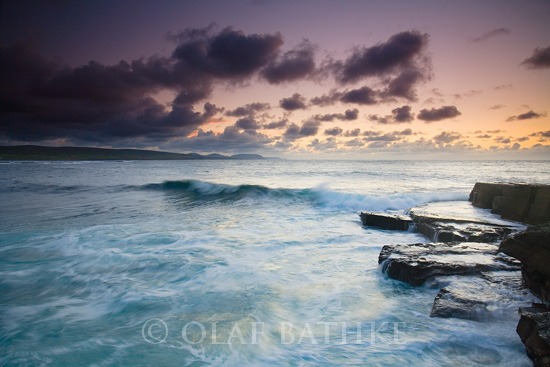 SR Warming Polarizer, SR 3 hard stop ND Filter
F8.0; 1/4 sec; ISO 100
Streaming water: Iceland
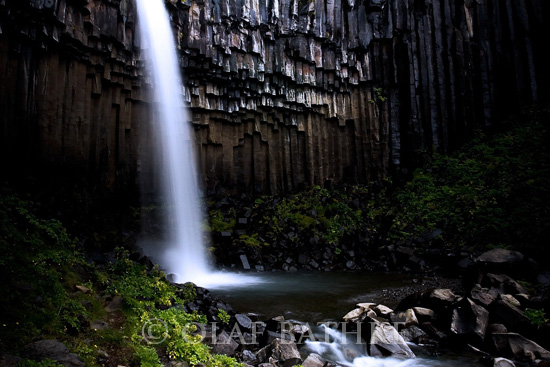 Vari-ND Filter
F8.0; 1.3 sec; ISO 100
Time exposures after sunrise: Norway
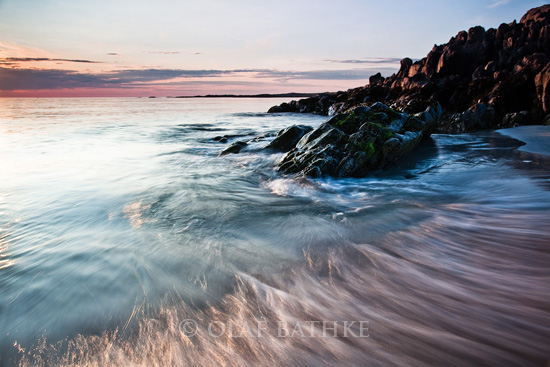 Vari-ND Filter
F11; 0.4 sec; ISO 320
Really long time exposures: Germany
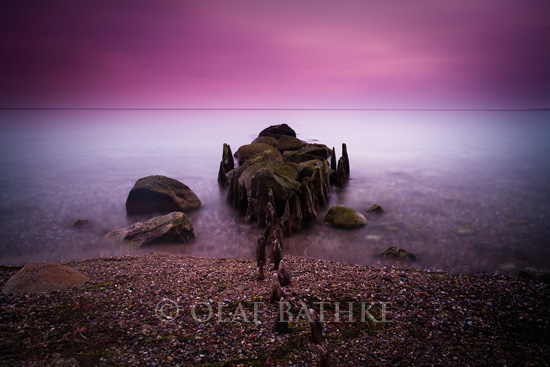 Vari-ND Filter, Mor-Slo ND Filter
F8.0; 20 sec; ISO 100
Related Posts
Buffer problems with the Canon 5 D mark III (3) – graphical problems on RAW files
Today I could see a strange graphical issue on 2 photos shot with my new…
Should I buy a new SSD for my old MacBookPro? Yes you should!
I f you are considering the investment in a new iMac because your pre Retina…
Buy used photography books
I have a huge collection of photo books. I love browsing through the pages. Studying…
June 25, 2012 at 15:58
Nurdin
Your article very useful and clearly. Good job and thank you very much for sharing this.
Pingback: Will Austin
January 15, 2011 at 13:36
fj-07
Herzlichen Dank Olaf,
die Filter sind wirklich ein Thema für sich, besonders die richtige Belichtung mit GND- Filtern.
Hast du evtl. einen Tipp für die ziehlführendeste Vorgehensweise?
Benutzt du einen Filterhalter oder ist deine Hand der Halter?
LG Frederik
Pingback: Olaf Bathke
Pingback: Olaf Bathke